Installing ScadaBR
Installing ScadaBR using a Virtual Machine
ScadaBR is an open source Supervisory Control and Data Acquisition (SCADA) system that allows you to create interactive screens, also called Human Machine Interface (HMI), for your automation projects. ScadaBR can talk to several different PLCs, including OpenPLC, which makes it a perfect companion for the OpenPLC runtime and editor.
The simplest way to install ScadaBR is by using a Virtual Machine. A Virtual Machine is a software that can create a virtual computer inside your own computer. The following steps will guide you to download and install VirtualBox, a free and open source Virtual Machine Monitor. Once VirtualBox is installed, all you have to do is load the ScadaBR image file into VirtualBox to have a ready-to-use ScadaBR environment on your system.
ScadaBR Installation Steps:
- Download VirtualBox from the official website
- Download ScadaBR virtual image file from here
- Install VirtualBox by running the installer downloaded on step 1.
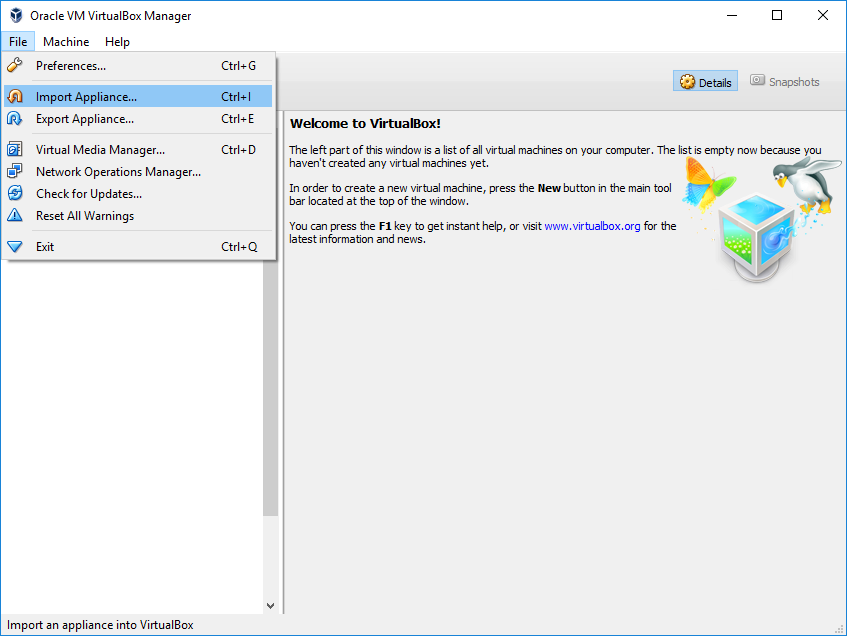
- Run VirtualBox and import ScadaBR image by clicking on File -> Import Appliance
- Click on the folder icon and select the ScadaBR.ova file downloaded on step 2.
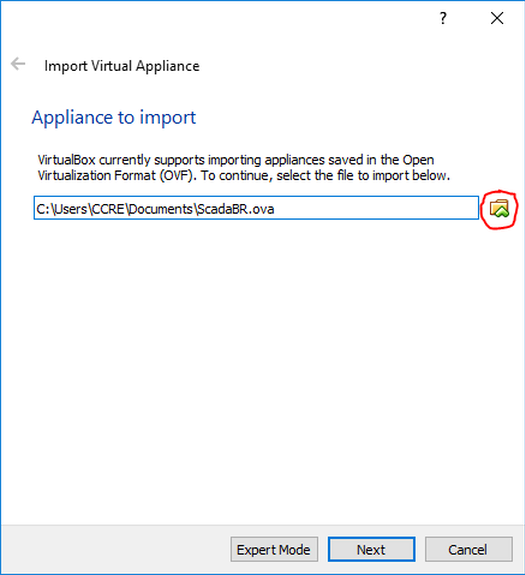
- Click on Next and then Import to load ScadaBR image into VirtualBox.
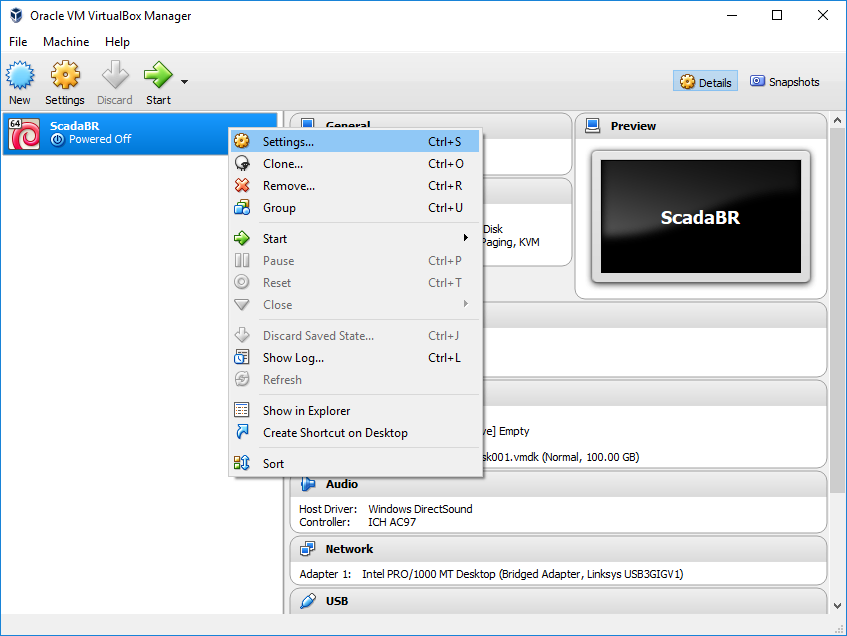
- Before starting ScadaBR, you need to configure the network of your virtual
machine so that ScadaBR can see the PLCs connected to your network. On
VirtualBox main window, right-click on ScadaBR and select settings
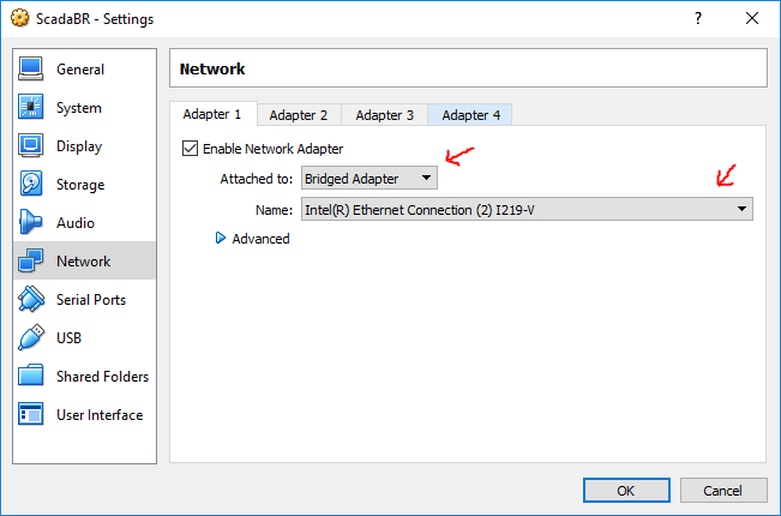
- Go to Network and at the option “Attached to:” make sure that Bridged
Adapter is selected. Then on “Name:” choose your network adapter.
VirtualBox will replicate your network adapter for the virtual machine.
Therefore, make sure that the adapter you select is actually the network
adapter that is connected to your network. Once you’re done, click on OK
to close this window.
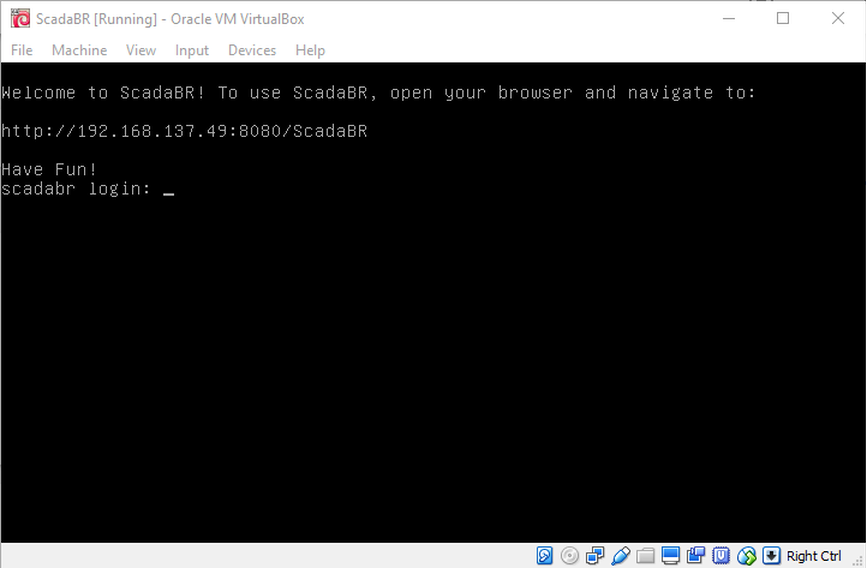
- Now you’re good to go! On the main VirtualBox screen click on Start to
launch ScadaBR. It might take a few seconds to load. Once it is finally
loaded, you will see this message on the screen:
Installing ScadaBR on Linux Natively
If you don’t want to use a Virtual Machine to install ScadaBR, you can also install it natively on Linux (not compatible with ARM devices). All you have to do is clone the repository with ScadaBR installer and run the installer script:
git clone https://github.com/thiagoralves/ScadaBR_Installer.git

cd ScadaBR_Installer

./install_scadabr.sh
Wait until the script install all the required components (JRE6 and Tomcat6) which can take about 5 minutes or less. Launch your browser and confirm that ScadaBR was installed by going to http://localhost:9090/ScadaBR. If the page loads then your installation was successful. If you get errors, wait a few minutes and try again. ScadaBR can take a few minutes to load entirely the first time it is launched.
This script installs ScadaBR 0.9. If you want to update to ScadaBR 1.0CE,
run ./update_scadabr.sh from terminal. Make sure to open ScadaBR at least
once before running this script, otherwise you might end up with a corrupted
installation.
Using ScadaBR
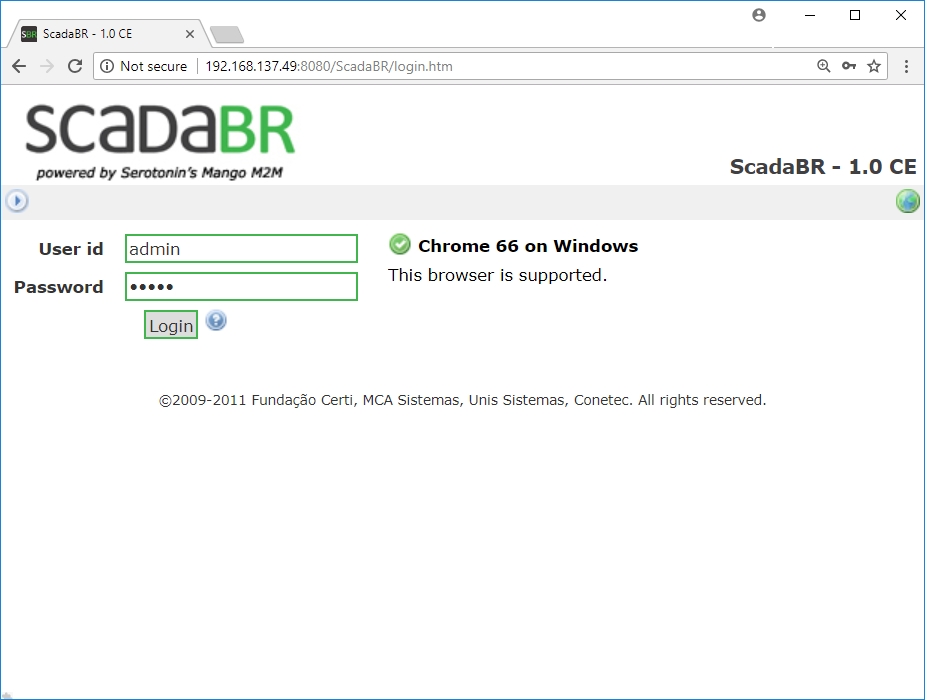
ScadaBR is a web application. To use it, you will need to open the browser on your computer and navigate to the address shown on the message (if you installed using the Virtual Machine approach) or to the address http://localhost:9090/ScadaBR (if you installed natively on Linux). You will then be presented with a login page. Use the following credentials to login for the first time:
User id: admin Password: admin
ScadaBR offers many features that you may find useful. They are all listed on the top menu, right below the ScadaBR logo. However, if you want to just stick to the basics, all you will have to do is configure your PLCs on Data Sources (6th icon from the left). If you’re adding an OpenPLC device, make sure to select the Modbus IP protocol. After you’ve added all your devices on the Data Sources menu, you can also add your Points, which are the specific data elements that you want to read from your PLC.
Finally, to create your graphical screens, go to Graphical Views (2nd icon from the left). With your points configured, all you have to do is drag and drop animations to the screen and associate each animation component with a previously added point.
If you want to know more deeply about all ScadaBR features, consider reading ScadaBR Manual here.